
It took me one night to make it work, so I’d like to write it down for next time.
Main Flow as follow diagram:
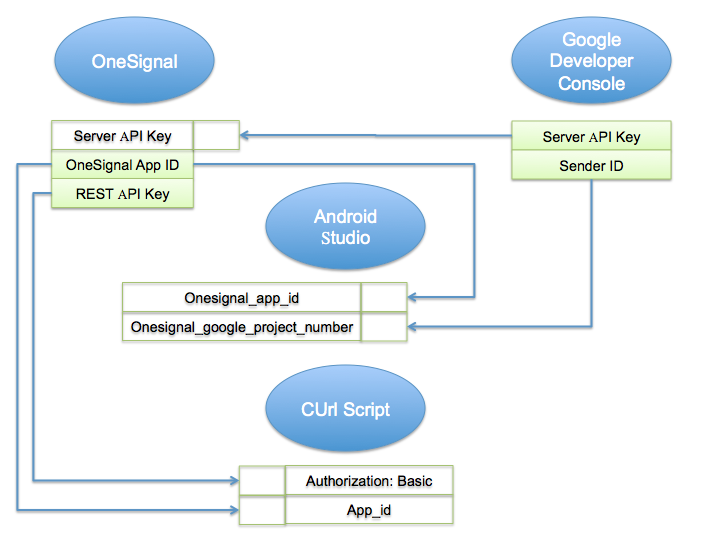
Green fields means “what values you can get”
White fields means “what values you should set”
And following are screeshots for each steps
1.Google Developer Console (GCM)
Get these two values.
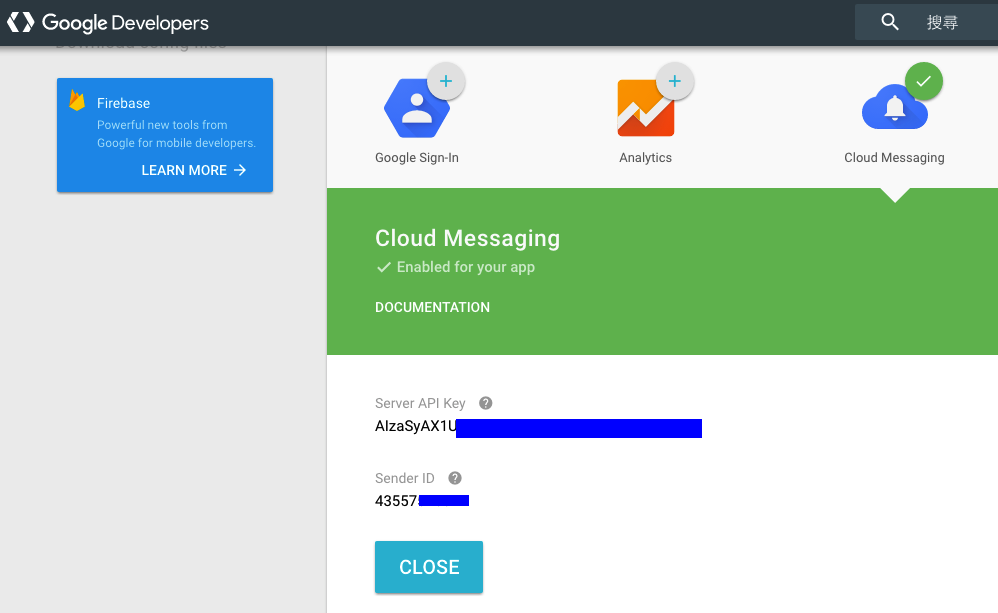
2.Set the Server API Key in OneSignal
Set OneSignal「Server API Key」to 「Server API Key」in Step 1

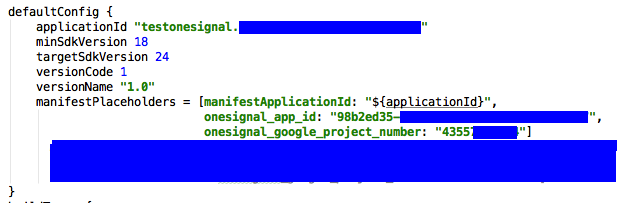
3.Set the Project number in Android Studio MainFest.xml (onesignal_google_project_number)
Set the onesignal_google_project_number to 「Sender ID」in Step 1

4.Onesignal (App Settings -> Keys & IDs)
Get these values.

5.Set the OneSignal App ID in Android Studio MainFest.xml (onesignal_app_id)
Set the onesignal_app_id to 「OneSignal App ID」in Step 4
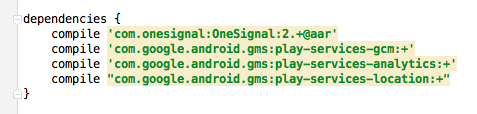
6.Include libraries in Android Studio
This is according to the OneSignal document
Basically this is all you have to do to send push notification to Android devices via OneSignal and Android Studio.
By the way, I used to use the CUrl script provided by OneSignal to test sending notification, here’s a sample for your reference.
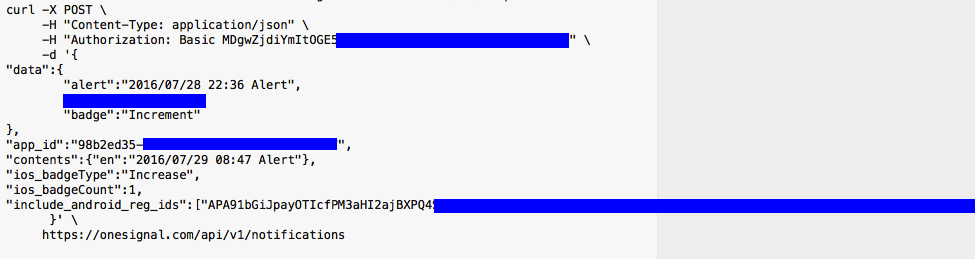
7.CUrl script
There are two fields to be set.
「Authorization Basic」 : set to 「REST API Key」in Step 4
「app_id」: set to 「OneSignal App ID」in Step 4
That’s all, happy pushing !!