1.Change project setting
Android Studio -> Preferences -> Version Control
Change 「VCS」value for <Project> from <none> to Git.

2.Create local repository
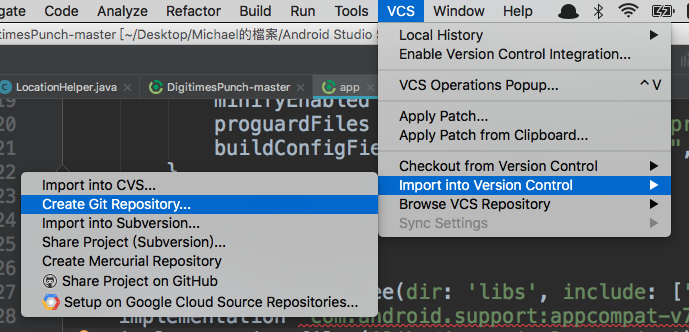
VCS -> Import into Version Control -> Create Git Repository
Choose the PROJECT root directory , NOT the APP directory.

2.5 Create remote repository in BitBucket
New -> Repository


Repository name : Necessary to fill
Include a README ? : Choose No (choose Yes will cause error later)
Create Repository and you’ll see this

There’s an URL you should copy (https://yourname@bitbucket.org/your-team/your-repository-name.git).
And to use the URL in Step 3.
3.Create remote repository in Android Studio
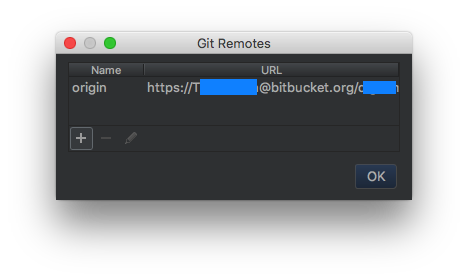
VCS -> Git -> Remotes
Create a remote Git repository with the URI from BitBucket like the following:
https://yourname@bitbucket.org/your-team/your-repository-name.git


4.Commit to local repository
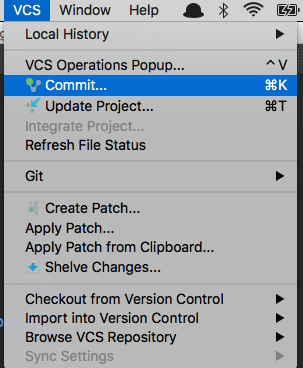
VCS -> Commit

5.Push to remote repository
VCS -> Git -> Push

6.Get project from remote repository
You are sucessful when you finished STEP 5.
Yet it is better to check out from remote repository to verify that everything necessary was pushed.
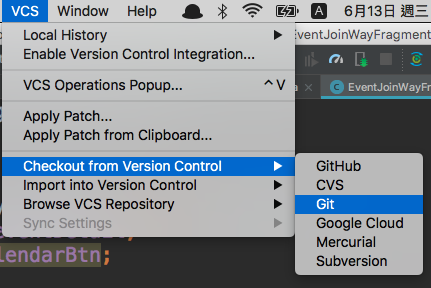
VCS -> Checkout from Version Control -> Git
Paste the same URL in step 3,
Select the local project directory (NOT the same directory in previous steps, create a whole new empty directory),
Then wait the project to be downloaded.

7.Run the app sucessfully means everything
Run the app to verify that everything was ok.
Although everything was downloaded successfully, the Android studio rejected to run the app with a prompt message 「please select the SDK version」.
File -> Project Structure -> Modules(app) -> Compile Sdk Verison
Dropdown the list menu , select the newest one SDK version, press OK button on the bottom-right corner.
Congratulations ! You’re ready to go.

